How To Fix Broken Lcd Screen On Tablet: A shattered tablet screen can feel like a devastating blow, leaving you disconnected from your digital world. This guide navigates the complexities of repairing a broken LCD screen, offering a practical approach for assessing the damage, determining repair feasibility, and executing a successful DIY repair (if appropriate). We’ll explore the various types of damage, the tools and parts you’ll need, and troubleshoot common issues along the way. Whether you’re a tech-savvy individual or a complete novice, this comprehensive guide empowers you to make informed decisions about restoring your tablet to its former glory.
From identifying the extent of the damage and understanding the cost implications of both DIY and professional repair to sourcing replacement parts and executing the repair itself, this guide provides a step-by-step approach to tackling this common technological challenge. We’ll also address critical safety considerations and highlight situations where professional help is strongly advised. The goal is to equip you with the knowledge and confidence to handle this repair effectively, or to make an informed decision about seeking professional assistance.
Assessing the Damage
Before attempting any repair, a thorough assessment of the LCD screen damage is crucial. Misdiagnosis can lead to further damage or wasted effort. Understanding the type and severity of the damage will guide your repair strategy and determine if a professional repair is necessary.
Tablet LCD screen damage manifests in various ways, ranging from minor cracks to complete screen failure. Accurately identifying the damage type is the first step towards successful repair.
Types of LCD Screen Damage
Tablet LCD screens can suffer from several types of damage. These include cracks (spiderweb cracks, single cracks, or shattered screens), discoloration (yellowing, blotches, or faded areas), dead pixels (single or multiple pixels that don’t illuminate), backlight failure (screen is dark but the digitizer may still function), and internal damage (visible damage to the LCD panel itself, often requiring professional repair). The severity of the damage directly impacts the repair complexity.
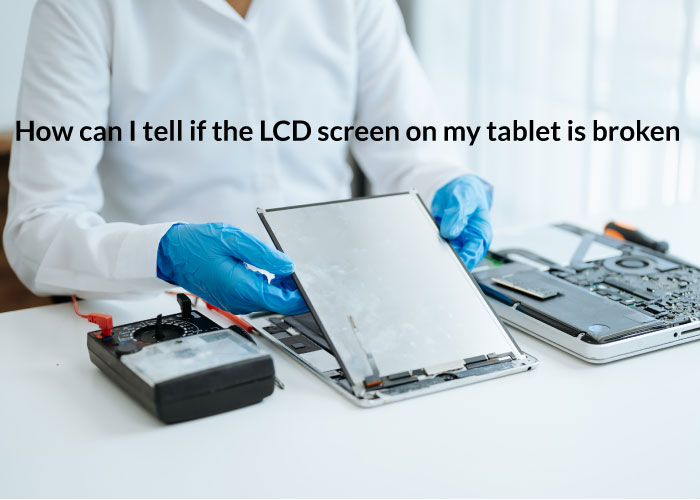
Visual Indicators of LCD Damage vs. Other Malfunctions
Distinguishing between a broken LCD screen and other tablet malfunctions is important. A broken LCD screen will typically show visible physical damage to the screen itself, such as cracks or discoloration. Other malfunctions, like software glitches or battery issues, will not show visible screen damage. A software problem might display distorted images or freezing, while a battery problem could lead to unexpected shutdowns. Careful observation is key to accurate diagnosis.
Safe Inspection of a Damaged Tablet Screen
Inspecting the tablet screen safely requires a cautious approach. Begin by powering off the tablet completely. Avoid touching the damaged area to prevent further damage or injury from sharp fragments. Use a clean, soft cloth to gently wipe away any dust or debris from the screen’s surface before inspection. Examine the screen carefully from different angles and lighting conditions to fully assess the extent of the damage.
Tools Required for Visual Inspection
A visual inspection of a damaged tablet screen typically requires minimal tools. A well-lit area is essential for clear visibility. A magnifying glass can help in identifying smaller cracks or defects. Clean, soft cloths are needed to prevent scratching the screen during the inspection. Gloves can protect your hands from sharp glass fragments.
Damage Summary Table
| Damage Type | Visual Indicators | Severity Level | Potential Causes |
|---|---|---|---|
| Cracks (Spiderweb, Single, Shattered) | Visible lines, breaks, or fragmentation of the glass or LCD panel. | Low to High (depending on extent) | Drops, impacts, pressure |
| Discoloration (Yellowing, Blotches, Fading) | Uneven color distribution, patches of different hues. | Low to Medium | Exposure to heat, moisture, or age. |
| Dead Pixels | Single or multiple pixels that remain black or a different color than surrounding pixels. | Low (unless widespread) | Manufacturing defects, screen pressure |
| Backlight Failure | Screen is completely dark or very dim, but touch functionality may remain. | Medium to High | Backlight component failure |
| Internal LCD Damage | Visible damage to the LCD panel itself, often appearing as internal bleeding or discoloration. | High | Severe impact or internal pressure. |
Determining Repair Feasibility
Repairing a broken LCD screen on a tablet involves several considerations beyond simply assessing the damage. The decision to repair or replace hinges on a careful evaluation of cost, risk, and the extent of the damage itself. Understanding these factors is crucial for making an informed decision.
Factors Influencing Repairability
Several factors determine whether repairing a broken LCD screen is even feasible. The type and severity of the damage are paramount. A simple crack might be repairable, while extensive shattering or internal damage may render repair impractical. The availability of replacement parts, specifically a compatible LCD screen assembly, is also crucial. Older tablet models might have limited or no readily available replacement parts. Finally, your own technical skills and comfort level with delicate electronics play a significant role.
Cost Comparison: Professional Repair vs. DIY
Professional repair shops typically charge a significant fee, often ranging from $100 to $300 or more, depending on the tablet model and the complexity of the repair. This cost includes labor, the replacement screen, and potentially other components if necessary. DIY repair, on the other hand, can be significantly cheaper. The cost primarily involves purchasing the replacement screen assembly, which can range from $30 to $150 depending on the tablet model and the source of the part. However, DIY repairs carry risks (discussed below) that could ultimately increase the overall cost if something goes wrong. For example, accidentally damaging other components during the repair could necessitate further professional intervention, adding to the overall expense.
Risks of DIY Repair
Attempting a DIY repair carries several inherent risks. Improper handling of the delicate components can lead to further damage, potentially rendering the tablet completely unusable. Static electricity can easily damage sensitive electronics. Furthermore, using incorrect tools or techniques can result in injury to yourself. Improperly installed replacement parts may not function correctly, leading to display issues or other malfunctions. Finally, voiding the manufacturer’s warranty is a common consequence of DIY repairs.
Situations Favoring Professional Repair
Professional repair is strongly recommended in several scenarios. If the damage is extensive, involving multiple cracks or internal damage, professional repair is generally the safer and more reliable option. If you lack the technical skills or experience in repairing electronics, attempting a DIY repair could lead to more harm than good. Similarly, if the tablet is still under warranty, attempting a DIY repair will likely void the warranty. Lastly, if the device holds irreplaceable data, entrusting the repair to a professional minimizes the risk of data loss.
Decision-Making Flowchart for Repair vs. Replacement
The decision to repair or replace a broken tablet screen can be visualized using a simple flowchart.
     [Start]
       |
       V
Is the damage minor (single crack)? -- Yes --> Attempt DIY repair
                                      -- No -->  Is the repair cost less than 50% of a new tablet? -- Yes --> Attempt professional repair
                                                                                                       -- No --> Consider Replacement
                                                                                                          |
                                                                                                          V
                                                                                                      [End]
This flowchart provides a basic framework. The specific cost thresholds and repair feasibility should be assessed based on the individual circumstances.
DIY Repair Methods (If Feasible)
Attempting a DIY repair of a broken tablet LCD screen can be a cost-effective alternative to professional repair, but it requires patience, precision, and the right tools. Success depends heavily on your comfort level with small electronics and your ability to follow detailed instructions carefully. Improper handling can lead to further damage, rendering the tablet unusable.
Tablet Disassembly
Disassembling a tablet to access the LCD screen involves carefully separating the various components. This process varies significantly depending on the tablet model. Generally, you’ll begin by removing the back cover, often secured with screws or adhesive. Once the back cover is removed, you’ll encounter the battery, which must be carefully disconnected before proceeding. Next, you’ll need to disconnect the various ribbon cables connecting the LCD screen, digitizer, and other internal components to the motherboard. These connections are delicate and require a gentle touch to avoid damage. Consult a repair guide specific to your tablet model for detailed instructions, as each device has a unique internal layout. Images would show the different screws, connectors and components involved, step by step. For example, an iPad mini might require removing several pentalobe screws around the perimeter before carefully lifting the screen. A Samsung Galaxy Tab might involve heating the screen to loosen the adhesive.
Broken LCD Screen Removal
Once the internal components are exposed, the broken LCD screen can be removed. This often involves carefully disconnecting the remaining ribbon cables connecting the LCD to the motherboard and digitizer. The screen itself may be adhered to the frame with adhesive, requiring careful prying with specialized plastic tools to avoid scratching the frame or damaging the screen further. Again, the exact method will vary depending on the tablet model. It is crucial to work slowly and methodically, using the correct tools to minimize the risk of damage. For instance, using a heat gun to soften the adhesive can make the process easier, but overheating can damage the components.
New LCD Screen Installation
Installing a new LCD screen involves carefully aligning the new screen with the frame and connecting the ribbon cables. Ensure the connectors are properly seated and aligned to prevent display issues. The new screen might require adhesive to secure it in place; the type of adhesive will depend on the replacement screen instructions. Excessive pressure should be avoided to prevent damage. Proper alignment is crucial; even a slight misalignment can result in display problems or a poor fit. A comparison of the old and new screens, paying close attention to the connectors, ensures proper installation.
Tablet Reassembly
Reassembling the tablet involves reversing the disassembly process. Carefully reconnect all the ribbon cables, ensuring they are securely in place. Replace the battery and reconnect it. Finally, reattach the back cover and secure it with screws. Before powering on the device, visually inspect all connections to ensure everything is properly connected. A functional device should show no signs of loose components or damaged connectors.
Essential Tools and Materials
Before beginning the repair, gather the necessary tools and materials. This includes:
- A suitable repair guide specific to your tablet model.
- A set of precision screwdrivers (including pentalobe, Phillips, and Torx, as needed).
- Plastic opening tools to avoid scratching the tablet’s casing.
- A suction cup for lifting the screen.
- Tweezers for handling small components.
- A heat gun (optional, but recommended for adhesive removal).
- Replacement LCD screen compatible with your tablet model.
- New adhesive (if required).
- Anti-static wrist strap (to prevent static electricity damage).
Sourcing Replacement Parts
Finding the right replacement LCD screen is crucial for a successful tablet repair. The quality of the part directly impacts the final result, and choosing a reputable vendor ensures a smooth purchasing experience. This section details how to source replacement parts, comparing vendors and highlighting key specifications to consider.
Finding a compatible replacement LCD screen for your specific tablet model is paramount. Incompatible parts will not fit correctly and may even damage your device further. Therefore, careful research and verification are essential before making a purchase.
Reputable Sources for Replacement LCD Screens
Locating reliable vendors for replacement LCD screens involves exploring both online and offline options. Online marketplaces like eBay and Amazon offer a wide selection, but careful vetting of sellers is crucial to avoid counterfeit or low-quality parts. Reading customer reviews and checking seller ratings is highly recommended. Offline options include local electronics repair shops, which may offer genuine parts or have access to reliable suppliers. They can also provide valuable advice on compatibility and installation.
Comparing Quality and Pricing
Prices for replacement LCD screens vary significantly depending on the vendor, the quality of the part, and the tablet model. Generally, higher-priced screens often indicate better quality, improved color accuracy, and potentially longer lifespan. However, this isn’t always the case, so comparing multiple vendors and reading customer reviews is important. Be wary of extremely low prices, as these may signify inferior quality or counterfeit parts.
Compatible LCD Screen Selection
Before purchasing a replacement screen, meticulously verify its compatibility with your specific tablet model. This involves checking the screen size (measured diagonally in inches), resolution (measured in pixels, e.g., 1920×1080), and connector type. The connector type ensures the screen connects correctly to the tablet’s motherboard. Incorrect specifications will lead to a failed repair. Always cross-reference the part number listed by the vendor with your tablet’s specifications, found in the device manual or on the manufacturer’s website. Failure to do so may result in purchasing an incompatible part.
Vendor Comparison Table
| Vendor | Price (USD) | Shipping Time (Days) | Customer Reviews |
|---|---|---|---|
| Amazon | $50 – $150 (depending on model and quality) | 2-7 (depending on location and shipping method) | Generally positive, but vary widely by seller. Check individual seller ratings. |
| eBay | $40 – $120 (depending on model and quality) | 3-10 (depending on location and shipping method and seller) | Wide range, from excellent to very poor. Thorough review checking is crucial. |
| Local Repair Shop | $60 – $200 (depending on model and availability) | 1-3 (often same-day or next-day availability) | Varies greatly, check online reviews for the specific shop. |
Specifications to Check Before Purchasing
Several key specifications must be verified before purchasing a replacement LCD screen. These include:
- Screen Size: The diagonal measurement of the screen in inches (e.g., 10.1 inches).
- Resolution: The number of pixels displayed horizontally and vertically (e.g., 1920×1080).
- Digitizer Type: Specifies the touch-sensitive layer. Common types include capacitive and resistive. Ensure the replacement matches your tablet’s digitizer.
- Connector Type: The type of connector used to connect the screen to the tablet’s motherboard. This is critical for compatibility.
- Part Number: A unique identifier for the screen, allowing for precise matching with your tablet’s model.
Troubleshooting Common Issues
Repairing a tablet LCD screen can present several challenges. Understanding common problems and their solutions is crucial for a successful repair. This section outlines troubleshooting steps for typical issues and preventative measures to avoid future damage.
Screen Discoloration
Screen discoloration, manifesting as patches of unusual color (e.g., yellowing, blurring, or banding), often indicates a problem with the LCD panel itself or its connection to the tablet’s motherboard. This isn’t always repairable with a simple screen replacement; sometimes, the underlying issue lies within the tablet’s circuitry. If the discoloration persists after replacing the screen, further investigation into the tablet’s internal components may be necessary. A faulty backlight or a damaged LCD driver IC could be the culprit.
Unresponsive Touch
An unresponsive touch screen can stem from several sources. A poorly connected digitizer, the layer responsible for touch input, is a frequent cause. Ensure the digitizer cable is securely connected to the motherboard. Damage to the digitizer itself, perhaps from a previous impact, is another possibility. In this case, replacement is often required. Furthermore, software glitches can also mimic an unresponsive touch screen. Attempting a factory reset (if data loss is acceptable) might resolve software-related issues before assuming hardware failure.
Backlight Problems
A lack of backlight, resulting in a dark screen despite a seemingly functional display, usually points to a faulty backlight assembly or a broken connection within the backlight circuit. This often requires replacing the entire LCD assembly, as the backlight is typically integrated into the screen unit. Sometimes, a loose connection or a damaged inverter board (which controls the backlight) might be the issue, necessitating a more in-depth repair. Inspecting the connections carefully before resorting to full replacement is recommended.
Preventing Future Screen Damage
Proper handling and preventative measures are essential to prolong the life of your tablet’s screen.
- Use a protective case or screen protector to shield the screen from scratches and impacts.
- Avoid placing heavy objects on the tablet.
- Handle the tablet gently to prevent drops or accidental damage.
- Clean the screen with a microfiber cloth and a screen-cleaning solution, avoiding harsh chemicals.
- Store the tablet in a safe place away from extreme temperatures and moisture.
Troubleshooting Flowchart
The following flowchart outlines a systematic approach to troubleshooting common repair problems:
| Problem | Check | Solution |
|---|---|---|
| Screen Discoloration | Check LCD connection; inspect LCD panel for damage | Replace LCD assembly; investigate motherboard issues |
| Unresponsive Touch | Check digitizer connection; inspect digitizer for damage; perform factory reset | Replace digitizer; software troubleshooting |
| Backlight Problems | Check backlight connections; inspect inverter board | Replace LCD assembly; repair or replace inverter board |
Grounding to Prevent Static Electricity Damage
Static electricity can severely damage sensitive electronic components. Before beginning any repair, ground yourself by touching a grounded metal object (like a radiator or a grounded metal surface) to discharge any static buildup. Using an anti-static wrist strap further minimizes the risk of electrostatic discharge (ESD) damage to the tablet’s components. This simple precaution can prevent costly mistakes during the repair process. Remember, even a small spark can be enough to permanently damage delicate parts.
Illustrative Examples
Understanding the visual characteristics of different types of tablet screen damage is crucial for accurate diagnosis and determining the best repair approach. The following examples illustrate common screen issues and their visual presentations.
Cracked LCD Screen with Backlight Bleed
A cracked LCD screen with backlight bleed presents a visually striking combination of damage. The LCD itself will show a network of cracks, possibly spider-webbing outwards from the point of impact. These cracks may be fine hairline fractures or larger, more pronounced breaks. Simultaneously, the backlight, which illuminates the LCD, will leak through the cracks and surrounding areas. This results in bright, uneven patches of light shining through the cracks, often appearing as glowing lines or blotches against the darkened areas of the cracked screen. The intensity of the backlight bleed can vary depending on the severity of the cracks and the type of backlight technology used in the tablet. The overall effect is a screen that is both visually broken and suffers from significant light leakage, making the display difficult or impossible to use.
Completely Shattered LCD Panel
A completely shattered LCD panel presents a drastically different visual appearance. Instead of a network of cracks, the LCD will be fragmented into numerous pieces. These pieces may be relatively large or very small, depending on the force of the impact. The image displayed on the screen will be completely obscured, replaced by a chaotic jumble of broken glass and possibly internal components. In many cases, the backlight will still function, casting a diffuse glow through the shattered fragments, further obscuring any underlying image. The screen may be entirely unresponsive to touch input. The shattered glass presents a significant risk of further injury, requiring careful handling during any attempted repair.
Visual Differences Between Damaged LCD and Damaged Digitizer
The visual differences between a damaged LCD and a damaged digitizer are subtle but significant. A damaged LCD will display visual distortions, such as cracks, discoloration, lines, or pixelation directly within the image displayed on the screen. The backlight may also be affected, leading to backlight bleed or uneven illumination. Conversely, a damaged digitizer, which is the touch-sensitive layer on top of the LCD, will not necessarily show visual distortions on the displayed image itself. Instead, the damage manifests as unresponsive touch input, ghost touches, or areas where the screen does not respond to touch at all. The image on the screen may appear perfectly normal despite the digitizer malfunction. Therefore, a screen that displays a perfect image but is unresponsive to touch indicates digitizer damage, not LCD damage.
Unresponsive Screen with Functional Backlight
A scenario where the tablet screen is unresponsive despite a functioning backlight indicates a problem with the digitizer or the connection between the digitizer and the tablet’s main board. The backlight illuminates normally, showing that the power supply and backlight itself are functional. However, no image is displayed, and touch input yields no response. This often indicates a severed connection between the digitizer and the main board, a faulty digitizer, or a software issue interfering with touch input. Visual inspection may reveal no apparent damage to the screen itself.
Color Distortion After Repair Attempt
Color distortion after a repair attempt can arise from several issues. Improperly seated ribbon cables connecting the LCD or digitizer to the main board can lead to color banding, incorrect color representation, or parts of the screen displaying incorrect colors. Damage to the LCD itself during the repair process can also cause color distortions. Furthermore, the use of a faulty or incompatible replacement LCD or digitizer can result in significant color inaccuracies. The specific type of color distortion (e.g., banding, inverted colors, washed-out colors) can help diagnose the underlying problem.
Ending Remarks
Repairing a broken tablet LCD screen can seem daunting, but with careful assessment, the right tools, and a methodical approach, it’s often achievable. This guide has equipped you with the knowledge to diagnose the damage, evaluate repair options, and, if you choose, to execute the repair yourself. Remember, safety and compatibility are paramount; prioritize professional repair if you are unsure about any aspect of the process. By following the steps outlined and understanding the potential challenges, you can significantly increase your chances of a successful repair, bringing your tablet back to life and restoring your digital connectivity.